Why vintage sewing machines

I first sewed on a sewing machine, like many folks, in middle school.  We had a project to make a pair of shorts.  The machines were setup for us, and we had the practice sheets for learning how to work the machine and control the speed, and then cut out the shorts and sewed them. My shorts came out very small, I nearly ran over my fingers several times, and I just wasn’t impressed with sewing at all at that point.

Over the course of the next 15 or 20 years, I would try sewing one different

Artists rendering 😉

machines 3 more times.  Every time the machine would be out of my control, or I would have a project turn out so horribly.  So I gave up.  I was petrified of sewing, never even wanted to pick up a needle.  At reenactments, friends would be sewing their gowns, or handkerchiefs or the like, and I would act like a vampire seeing sunlight when they offered to let me try.

Then my aunt taught me how to quilt.  And one day, I decided I should try piecing.  So up to the local used furniture store, to look for a used sewing machine. Suprisingly, there was a gorgeous Singer in a cabinet for 35 dollars.  What a steal!  I verified it worked, and took it home. Thus began my love of machines.

What caused the change? Well for one, I’m sure it was age and patience for me personally.  I wanted everything done quickly, and as most sewists know, there’s nothing quick about any sewing.  However, comparing my used Singer to a modern machine a friend had given to me (a Husqvarna Viking), I also learned that I much preferred the feel of the vintage sewing machine’s operation.  But why?

Clearly magic sewing machine gnomes

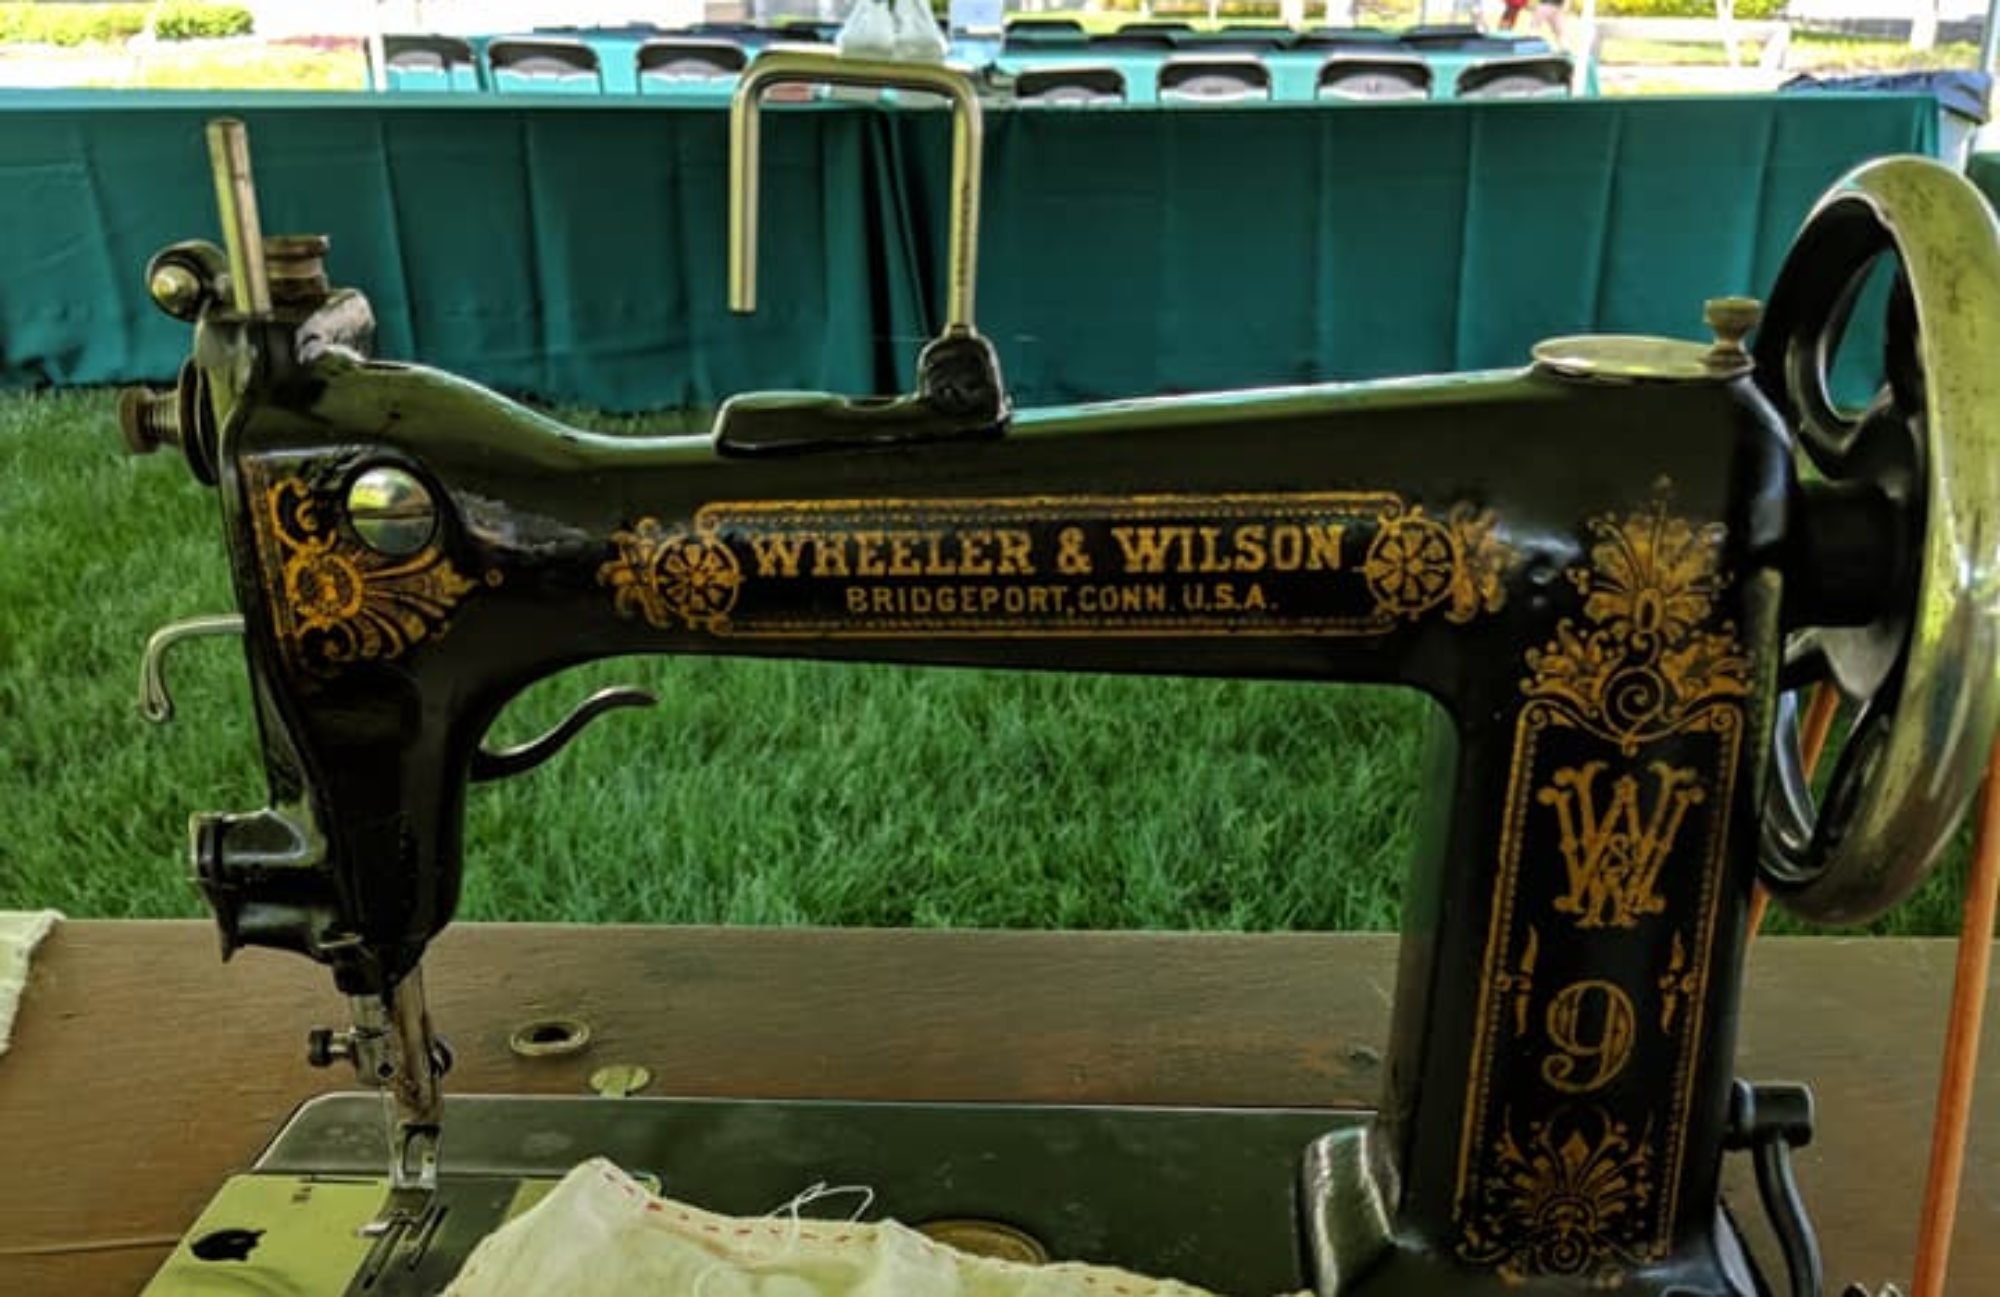
I think that one of the big draws for me is that they are all metal.  Modern machines are primarily made of plastic gears and pieces, to allow for quick and low cost assembly.  Even though you may be paying out the nose for a state of the art machine- you’re paying for the computer within the machine, not the machine itself. Metal machines are just simple.  All the mechanisms that are in its operation are easy to understand and maintain.

The feed dogs and presser feet on metal machines, I believe control things much better than the modern machines.  I can feel the machine actually gripping the fabric and moving it.  But also I have to pay more attention to it to make sure its straight. As a bit of a control freak, I don’t mind that though.

I’m also not as afraid of breaking a vintage machine as I am a modern one.  Perhaps is because of their metal makeup, but I know its much more difficult to break these machines than it would be a plastic one.  I keep pins in when I sew, I put fabric that’s too thick for the needle in the machine sometimes, and lets not talk about how many needles I’ve broken, pushing the fabric through too fast. However I’ve never worried about breaking the machine in the process. But the plastic machines I’ve worked with, or on, I’m always so tentative and nervous that I’m going to snap a gear if I work it too much, or the little lever that changes the stitch length is going to fall apart.

What I feel like will happen when I use a modern machine

Finally, and this is mostly the sentimental side of me here, these machines were used for years by people generations before me that learned to sew on these, or whose children learned to sew on these. They were used for quilts, clothing, tablecloths, linens, and so much more.  Its continuing their legacy by using these machines for my projects, both traditional and non traditional.  So in some ways I feel as if their hands are guiding mine in my lessons on what to do/what not to do with these beauties.  In the future I hope that others will see the value in these vintage and antique pieces as well for their own sewing, and as I teach more people about sewing, perhaps they too will grab a legacy piece of their own.

And that last piece is why I have over 70 in my collection.  To pass on to future generations who wish to learn to sew.

But also because they’re all beautiful.

I mean really- how gorgeous is she

To Wash or Not To Wash?

A common theme that seems to come across many quilt groups I’m part of, in quilt guild conversations, and even in books and magazines, is the question of fabric washing.  The debate rages on, and probably will continue to, however I have felt compelled to discuss my opinions on the subject, for those looking for more reasoning behind why or why not, and a how-to for doing so as well.

The short response for me is that I do wash.  I wash all the fabrics that come into the house. The exception to this is only if I’m getting fabric from someone who I know also washes all their fabrics (or I can smell the Downy/Tide/etc.)

I know, I need to clean the fabric softener place.

I wash for several reasons. The big one is because that was what i was taught to do when learning how to quilt. My aunt pre-washes all fabrics- the fabrics for piecing and the backings- and taught me to do so as well. The washing removes any sizing/starchiness that was in the fabric, allowing it to be more accurately sized, and easier to iron and cut. It also allows the deeper colors to bleed out their extra ink, thus preventing it from happening when you finish the quilt and wash it for the first time, allowing it to bleed into the whites and other light colors that may also be in your quilt. Reds and blues bleed especially rough.

Additionally, and this is just a personal belief, I think that washing it how it will be used actually helps to condition the quilt for its life after you’ve finished it.  It may just be me, but I think it does help to  make the quilt more malleable when cutting, piecing, and quilting.  Also, you have no idea where that fabric has been, so washing it with detergent you’re comfortable with helps also to remove some of the “what if there’s something I’m allergic to in the chemicals in/on the fabric” that sometimes comes about.  This is especially true if someone else has washed it with detergent you aren’t familiar with, and you have sensitivities to perfumes, dyes, or other chemicals.

One other advantage to pre-washing is the ability to pull it from the dryer just a little damp, which helps with ironing dramatically.  Instead of spraying all over the piece and ironing, its already ready to be ironed, and this helps to pull the wrinkles and fold marks out beautifully.

So then the question becomes, how do you wash your fabrics?  The answer is pretty simple- the same way I wash my clothes.  Sometimes I even wash them together! *gasp!*

I use my usual detergent, my usual fabric softener, but I also include Color Catchers. 

Color catchers, made by Shout or Carbona, are designed to grab all the loose dyes that bleed out of those intense colors during washing.  They pull the black, red, blue, purples out of the water, so they don’t bleed into other colors. Finding these has been invaluable to me in saving fabrics- especially since a lot of my quilting includes large white spaces, and white cotton thread.

If I know that a specific fabric, or project is going to be given to someone with detergent/fabric softener sensitivities, I also have a fabulous homemade laundry detergent recipe that I use to wash instead of my typical Tide.  The recipe I use comes from this site.  I use the general cycle on my washer, which takes about 48 minutes.

Once washed, it goes straight into the dryer for about 60-70 minutes depending on the amount of fabric I’m washing. (Black Friday sometimes I have to wait and do 90 minute washes because I buy a lot of fabric. 🙂 ) I try to leave it a little damp when I pull it out , so then I can separate it and iron it, then put it away, or immediately put it to work, if it was bought for a specific project.

Now, I know some of you are probably saying- But it ends up being a knot of ends and craziness! And you’re totally right.  But I love living dangerously…and cutting those ends.  For those of you who aren’t as excited about that adventure, you can zig-zag stitch or serge the edges of your fabric before washing to prevent that fraying.

Another thing I do, especially with fat eighths and these awesome scrap bags that my local quilt shop sells, is to use a Lingerie bag to wash them. That way you’re not dealing with hundreds of tiny scraps you’re digging out of the bottom of your washer, but you’re still washing them. I have about 6 I picked up at the dollar store to use, because I’m addicted to the scrap bags at my local quilt shop.  They’re like trick or treating for awesome fabric!  I’ll discuss these more at a later time.

I have no idea what all is in here, but I can’t wait to find out!!

The one thing that I recommend not washing, are precut fabrics.  Mini charm packs, circles, anything that has already been cut to a certain size for you to use for a project.  The fabric does shrink in the wash, and washing the pre-cuts can affect the accuracy of your project.  However, in my case, I only use pre-cut mini charm packs, so this isn’t typically an issue for me.


So there ya go- my viewpoint on the whole To Wash or Not To Wash debate.  Tl;dr- Wash everything except for tiny precuts cause they shrink too much. Also, clean your washer before blogging about it.